
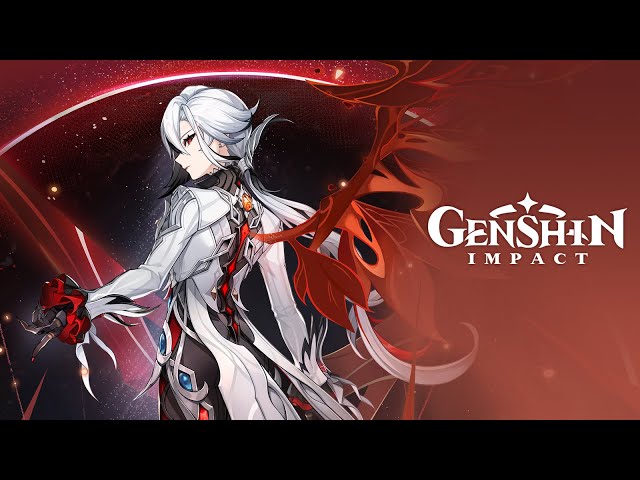
Every day we get closer to Snezhnaya, and the reveal of all the Harbingers, including Genshin Impact’s Arlecchino. We meet her in Fontaine as part of the archon quest, and now, we can have her on our teams as a formidable pyro user. Read on to see her best weapons, artifact sets, and team comps.
For more Genshin goodness, check out our Genshin Impact banner schedule for all the upcoming characters, and these Genshin Impact codes for some free gems and mora.
Here’s how to build Genshin Impact’s Arlecchino, Father, The Knave – whichever name you want to call her.
What’s the best Genshin Impact Arlecchino build?
| Best weapon | Crimson Moon’s Semblance |
| Weapon substitutes | Staff of Homa, Deathmatch |
| Best artifact set | Fragment of Harmonic Whimsy |
| Main stats | Sands – Attack Goblet – Pyro damage bonus Circlet – Crit rate/damage |
| Sub stats | Crit rate, crit damage, attack, energy recharge |
Arlecchino is a pyro DPS, who applies a Bond of Life and cannot be healed during combat by other party members – so keep that in mind!
Arlecchino’s best weapon is the Crimson Moon’s Semblance polearm, and her best artifact set is Fragment of Harmonic Whimsy. As her kit is quite specific for a DPS, you should aim for these items.
During combat, she applies a Blood-Debt Directive to enemies she hits with her elemental skill. If she uses her burst or a charged attack on enemies with this Blood-Debt, she absorbs and clears the state. This gives her a Bond of Life. This Bond absorbs any healing that Arlecchino receives, and gives her attacks a boost, and reduces the cooldown of her elemental skill.
Also, a fun extra thing – during her attacks, Arlecchino’s polearm takes on a scythe shape – this may be limited to her signature weapon, but either way it’s cool as heck.
What are the best weapons for Arlecchino?
Arlecchino is a polearm user, and has her own signature weapon – Crimson Moon’s Semblance – coming out with her debut banner. At the moment, we don’t know the details of this weapon or what she scales off, so we can’t recommend any specific polearms for you to prepare.
| Weapon | Effect | How to obtain |
| Crimson Moon’s Semblance (five-star) | Bonus stat: Increases crit rate Effect: Grants a Bond of Life (equal to 25% of Arlecchino’s HP) when a charged attack hits an opponent. This can trigger once every 14 seconds. She gains a 12% damage bonus when the Bond of Life is active. If the Bond of Life goes over 30% of Arlecchino’s HP, she gets an extra 24% damage bonus |
Weapon banner (alongside Arlecchino) |
| Staff of Homa (five-star) | Bonus stat: Increases crit damage Effect: Increases Arlecchino’s HP by 20%, and provides an attack bonus based on 0.8% of her maximum HP. When her HP drops to less than 50%, the attack bonus increases to 1.8% |
Weapon banner (alongside Hu Tao) |
| Deathmatch (four-star) | Bonus stat: Increases attack Effect: If there are two or more enemies nearby, Arlecchino’s attack and defense increase by 16%. If there are less than two, her attack increases by 24% |
All banners |
| White Tassel (three-star) | Bonus stat: Increases attack Effect: Arlecchino’s normal attack damage increases by 24% |
All banners |
What are the best artifacts for Arlecchino?
A set introduced at the same time as Arlecchino, Fragment of Harmonic Whimsy, plays into the Bond of Life mechanic in its four-piece set, so is the best option for her. If you’re struggling to get a good, full set, there are some other options, though.
| Artifact set | Effect | How to obtain |
| Fragment of Harmonic Whimsy | Two equipped: Increases attack Four-piece set: When the value of a Bond of Life increases or decreases, Arlecchino deals 18% more damage for six seconds. This can stack three times |
Faded Theater domain in Fontaine |
| Shimenawa’s Reminiscence | Two equipped: Increases attack Four-piece set: When Arlecchino uses her elemental skill if she has 15 or more energy, she loses this and gains a 50% damage bonus to her normal, charged, and plunge attack damage for ten seconds |
Momiji-Dyed Court domain in Inazuma |
| Echoes of an Offering | Two equipped: Increases attack Four-piece set: When Arlecchino’s normal attack hits an opponent, there is a 36% chance to trigger Valley Rite. This increases her normal attack damage by 70% of her attack stat. This dispels 0.5 seconds after her normal attack deals damage. If an attack fails to trigger Valley Rite, the odds of it triggering next time increase by 20% |
The Lost Valley domain on the Chasm’s surface |
| Crimson Witch of Flames | Two-piece set: Increases pyro damage Four-piece set: This set increases overloaded, burning, and burgeon damage by 40%, and vaporize and melt by 15%. Using an elemental skill increases the two-piece effects by 50% for ten seconds, which can stack three times |
Hidden Palace of Zhou Formula domain in Liyue |
| Gladiator’s Finale | Two equipped: Increases attack Four-piece set: Because Arlecchino uses a polearm, she gets the four-piece bonus of a 35% damage increase on her normal attacks |
Reward for Trounce Domains, world bosses, and the strongbox |
Artifact stat recommendations
When picking out artifacts, remember to look at the stats. We all know what it’s like getting our preferred pieces, but keep an eye on the main and sub-stats.
Main stats:
- Sands: Attack
- Goblet: Pyro damage bonus
- Circlet: Crit rate/damage
Sub-stats:
- Crit rate/crit damage
- Attack/attack %
- Energy recharge
")
What are the best Arlecchino team comps?
Arlecchino, as your main DPS, benefits from buffers like Bennett, groupers like Kazuha or Sucrose, and some reaction enablers like a hydro or electro unit.
Now, we all know Furina is an excellent hydro applicator, but with her HP drain mechanic and Arlecchino’s Bond of Life, it can be tricky to create synergy between them. Therefore, if you have Xingqiu or Yelan, we recommend them instead.
A key thing to remember is that one of Arlecchino’s passive talents means that she cannot be healed by other party members, only herself, during combat. If you have Zhongli, he’ll be a good option to keep her safe.
| First character slot | Second character slot | Third character slot | Fourth character slot |
 Arlecchino Arlecchino |
|||
| Arlecchino |
|||
| Arlecchino |
What are Arlecchino’s abilities?
Here is everything Arlecchino is capable of. Hint – it’s a lot of pyro damage!
Active skills:
| Skill | Effect |
| Normal attack: Invitation to a Beheading | Normal: Arlecchino performs up to six strikes with her polearm Charged: She consumes stamina to charge forward toward an enemy. Holding this button causes her to consume more stamina, but she can float for five seconds Plunging: Arlecchino plunges from mid-air to strike the ground, dealing damage to opponents close by |
| Normal attack: Masque of the Red Death | When Arlecchino has a Bond of Life equal to (or greater than) 30% of her maximum HP, she enters the Masque of the Red Death state. This converts her normal, charged, and plunge attack damage to pyro damage and cannot be overridden. When in this state, her normal attacks deal extra damage to opponents, scaling off her attack stat, multiplied by a percentage of the Bond of Life. This consumes 7.5% of the current Bond of Life and can trigger every 0.3 seconds |
| Elemental skill: All is Ash | Arlecchino summons Balemoon Bloodfire, which deals pyro damage to multiple targets. She also dashes toward them, dealing AoE pyro damage. Opponents hit with this attack will have a Blood-Debt Directive applied to them Blood-Debt Directive: This lasts 30 seconds. Two instances of extra pyro damage trigger five seconds apart. When Arlecchino uses a charged attack or elemental burst, she absorbs any nearby Directives, which each give her a Bond of Life worth 65% of her maximum HP, up to a maximum of 145%. Using her elemental skill again during this time restarts the count on duration |
| Elemental burst: Balemoon Rising | Arlecchino’s great wing of Bloodfire causes her to absorb and clear Blood-Debt Directives. In this attack, she deals AoE pyro damage around her, while clearing the cooldown of her skill – All is Ash – and healing herself based on her Bond of Life value and attack stat |
Passive skills:
| Skill | Effect |
| Agony Alone May Be Repaid | Blood-Debt Directives have the following characteristics: -Arlecchino gets a Bond of Life worth 130% of her maximum HP when an opponent with the Directive gets defeated -Five seconds after applying a Directive, it upgrades to Blood-Debt Due. This, when absorbed, grants a Bond of Life worth 130%. A Bond of Life created in these ways cannot exceed the previous limit of All is Ash Bonds of Life |
| Strength Alone Can Defend | Arlecchino gains 1% elemental and physical resistance for every 100 attack she has over 1,000. The maximum she can gain from this is 20% |
| The Balemoon Alone May Know | When in combat, Arlecchino gains a 40% pyro damage bonus and can only be healed through Balemoon Rising |
What are Arlecchino’s constellations?
Arlecchino has some excellent skills in her constellations, so if you’ve been saving up, you’re in luck. Her C2 and C6 are excellent damage-dealing cons, and we recommend going for them if you’re pulling for more than one copy of her.
| Constellation | Effect |
| C1 – “All Reprisals and Arrears, Mine to Bear…” | Masque of the Red Death further enhances to 100%. Arlecchino’s interruption resistance increases when she performs a normal or charged attack under the Masque |
| C2 – “All Rewards and Retribution, Mine to Bestow…” | Blood-Debt Directives are now Blood-Debt Due by default. When she absorbs a Due, Arlecchino unleashes Balemoon Bloodfire in front of her, dealing 900% of her attack as pyro damage. This also increases her elemental resistance and physical resistance by 20% for 15 seconds. This can trigger once every ten seconds |
| C3 – “You Shall Become a New Member of Our Family…” | Increases Arlecchino’s normal attack level by three, up to a maximum of level 15 |
| C4 – “You Shall Love and Protect Each Other Henceforth…” | When Arlecchino absorbs a Blood-Debt Directive, Balemoon Rising’s cooldown decreases by two seconds, and she gains 15 energy. This can occur once every ten seconds |
| C5 – “For Alone, We Are as Good as Dead…” | Increases the level of Balemoon Rising by three, up to a maximum of level 15 |
| C6 – “From This Day On, We Shall Delight in New Life Together…” | The damage of Balemoon Rising increases by Arlecchino’s attack stat, multiplied by 700% of her current Bond of Life. For 20 seconds after using her skill, All is Ash, her normal attacks and elemental burst gain 10% crit rate and 70% crit damage. This can trigger once every 15 seconds |

What are Arlecchino’s ascension materials?
Ascending Arlecchino is key. To do that, you need agnidus agate gems, rainbow roses available in Fontaine’s overworld, and Fatui enemy drops.
| Required level | Mora | Materials |
| 20 | 20,000 | One agnidus agate sliver, three rainbow roses, three recruit’s insignia |
| 40 | 40,000 | Three agnidus agate fragments, two fragments of a golden memory, ten rainbow roses, 15 recruit’s insignia |
| 50 | 60,000 | Six agnidus agate fragments, four fragments of a golden memory, 20 rainbow roses, 12 sergeant’s insignia |
| 60 | 80,000 | Three agnidus agate chunks, eight fragments of a golden memory, 30 rainbow roses, 18 sergeant’s insignia |
| 70 | 100,000 | Six agnidus agate chunks, 12 fragments of a golden memorys, 45 rainbow roses, 12 sergeant’s insignia |
| 80 | 120,000 | Six agnidus agate gemstones, 20fragments of a golden memory, 60 rainbow roses, 24 sergeant’s insignia |
What are Arlecchino’s talent materials?
To get Father’s talents up to speed, you’re gonna need some specific items. She needs the order set of talent books, available from the Pale Forgotten Glory domain in Fontaine. Along with that, you’ll need a stack of Fatui enemy drops, ironically, including the recruit, sergeant, and lieutenant insignia items. As for the drop from a weekly boss, well, it’s her. You need to fight The Knave to get Arlecchino’s talents up.
| Talent level | Mora | Materials |
| Two | 12,500 | Six recruit’s insignia, three teachings of order |
| Three | 17,500 | Three sergeant’s insignia, two guides to order |
| Four | 25,000 | Four sergeant’s insignia, four guides to order |
| Five | 30,000 | Six sergeant’s insignia, six guides to order |
| Six | 37,500 | Nine sergeant’s insignia, nine guides to order |
| Seven | 120,000 | Four lieutenant’s insignia, four philosophies of fairness, one fading candle |
| Eight | 260,000 | Six lieutenant’s insignia, six philosophies of order, one fading candle |
| Nine | 450,000 | Nine lieutenant’s insignia, 12 philosophies of order, two fading candles |
| Ten | 700,000 | 12 lieutenant’s insignia, 16 philosophies of order, two fading candles, one crown of insight |
Who is Genshin Impact’s Arlecchino?
Arlecchino is one of the Eleven Fatui Harbingers that work for the Tsaritsa. She’s known as The Knave and the fourth Harbinger. Arlecchino appears as a female character, with short blonde hair featuring a black streak. Comparisons have been drawn between her and Genshin Impact Eula due to their hairstyle and color palettes.
We currently have a few voice lines about her in the game, coming from our playable Harbingers – Childe and Wanderer – and Fontaine’s Lyney and Lynette. In essence, Childe assumes she ‘has her own agenda’, but he’s not a fan of her. He mentions she isn’t very sane and would betray others if a benefit for her was on the table. Wanderer, on the other hand, quotes that she is a “wolf in sheep’s clothing”, and she wants more power over others. He also insinuates that she is perhaps crazy. The twins on the other hand commend her for providing a home to them and other children.
In English, Arlecchino is played by Erin Yvette, and in Japanese, by Nanako Mori. Her Chinese voice actor is currently unknown.
If you’re still interested in more Genshin lore and builds, check out our guides on Genshin Impact’s Bennett, Genshin Impact’s Yun Jin, and Genshin Impact’s Xianyun to flesh out your Fontaine roster’s skills.